How to build an OTP Login System with React and Supabase

👋 Hey there! I'm Shivam, a self-taught web developer from India. My passion lies in web development, and I thrive on contributing to open-source projects and writing technical blogs. 🚀
Teamwork fuels my creativity, and I take pride in building efficient, user-friendly solutions. Let's code together! 💻🌟
Today, OTP Login is one of the secure ways to log into our system. And, today, we're going to build the same thing. We'll be building an app where there will be a login page and a dashboard page. So, the user needs to enter their phone number and after that, an OTP will be sent to that number. From that, it will verify that the OTP is correct, and it will take us to the dashboard page else, it will tell us to enter the correct OTP number.
To build this project, we're going to use a few technologies. React, Supabase, Twilio, and Tailwind CSS. Below you can see a working of it. Now, without wasting a bit, let's start.
Note
Supabase Setup
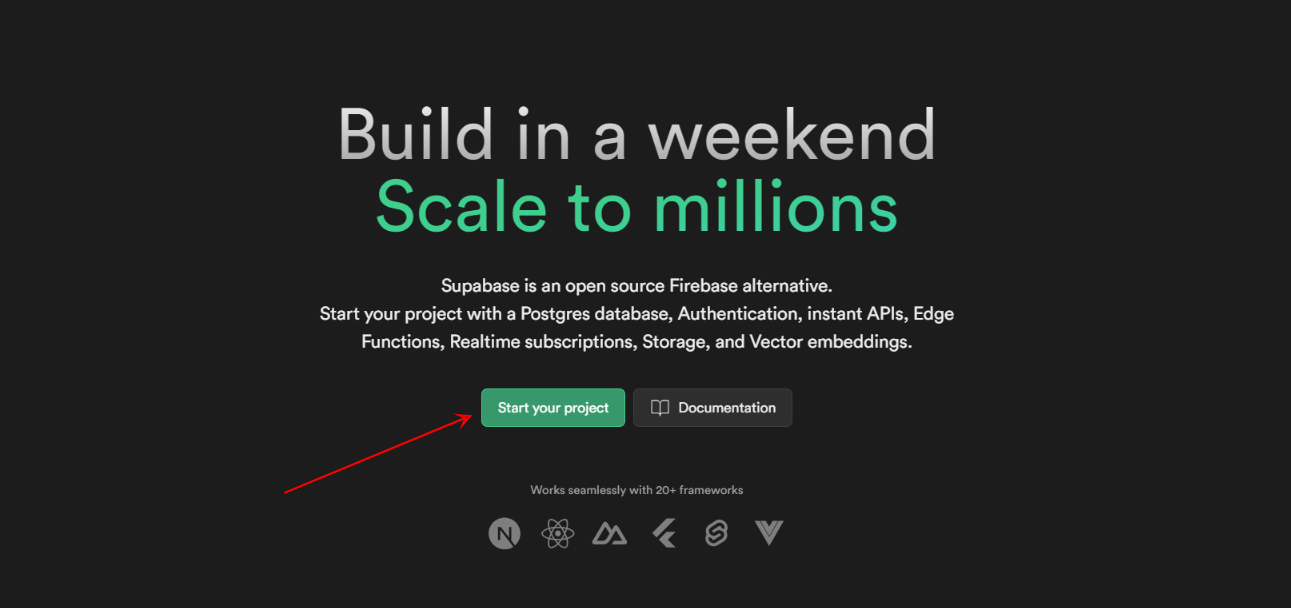
We'll start with setting up the supabase project first. Go to this link and login/Sign up to the supabase. After signing up, click on the Start Your Project button to get it started.
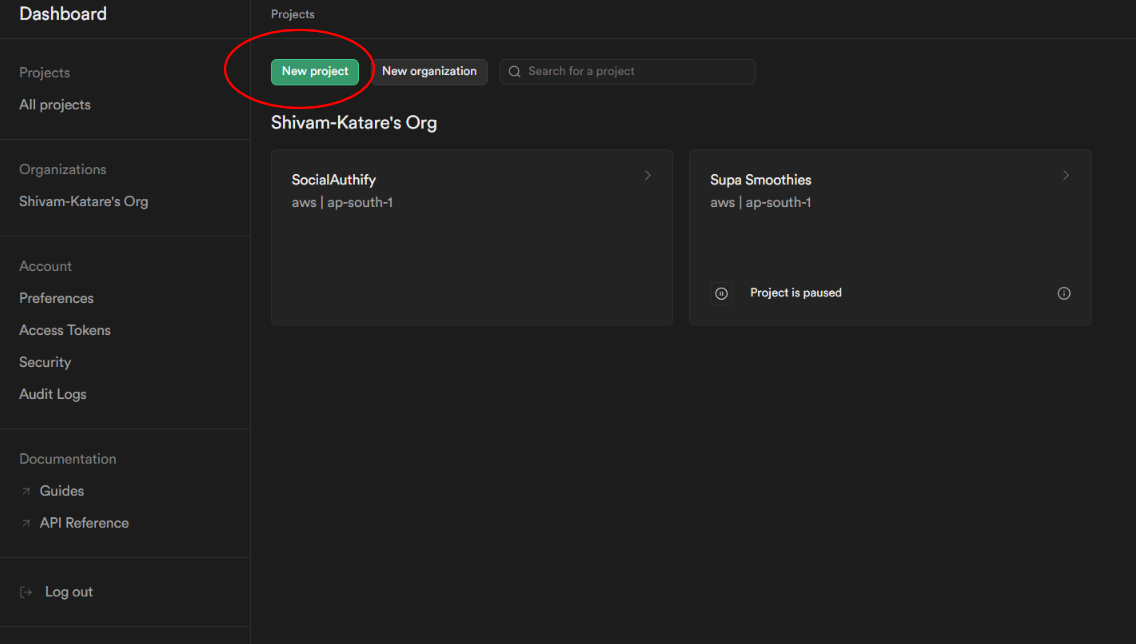
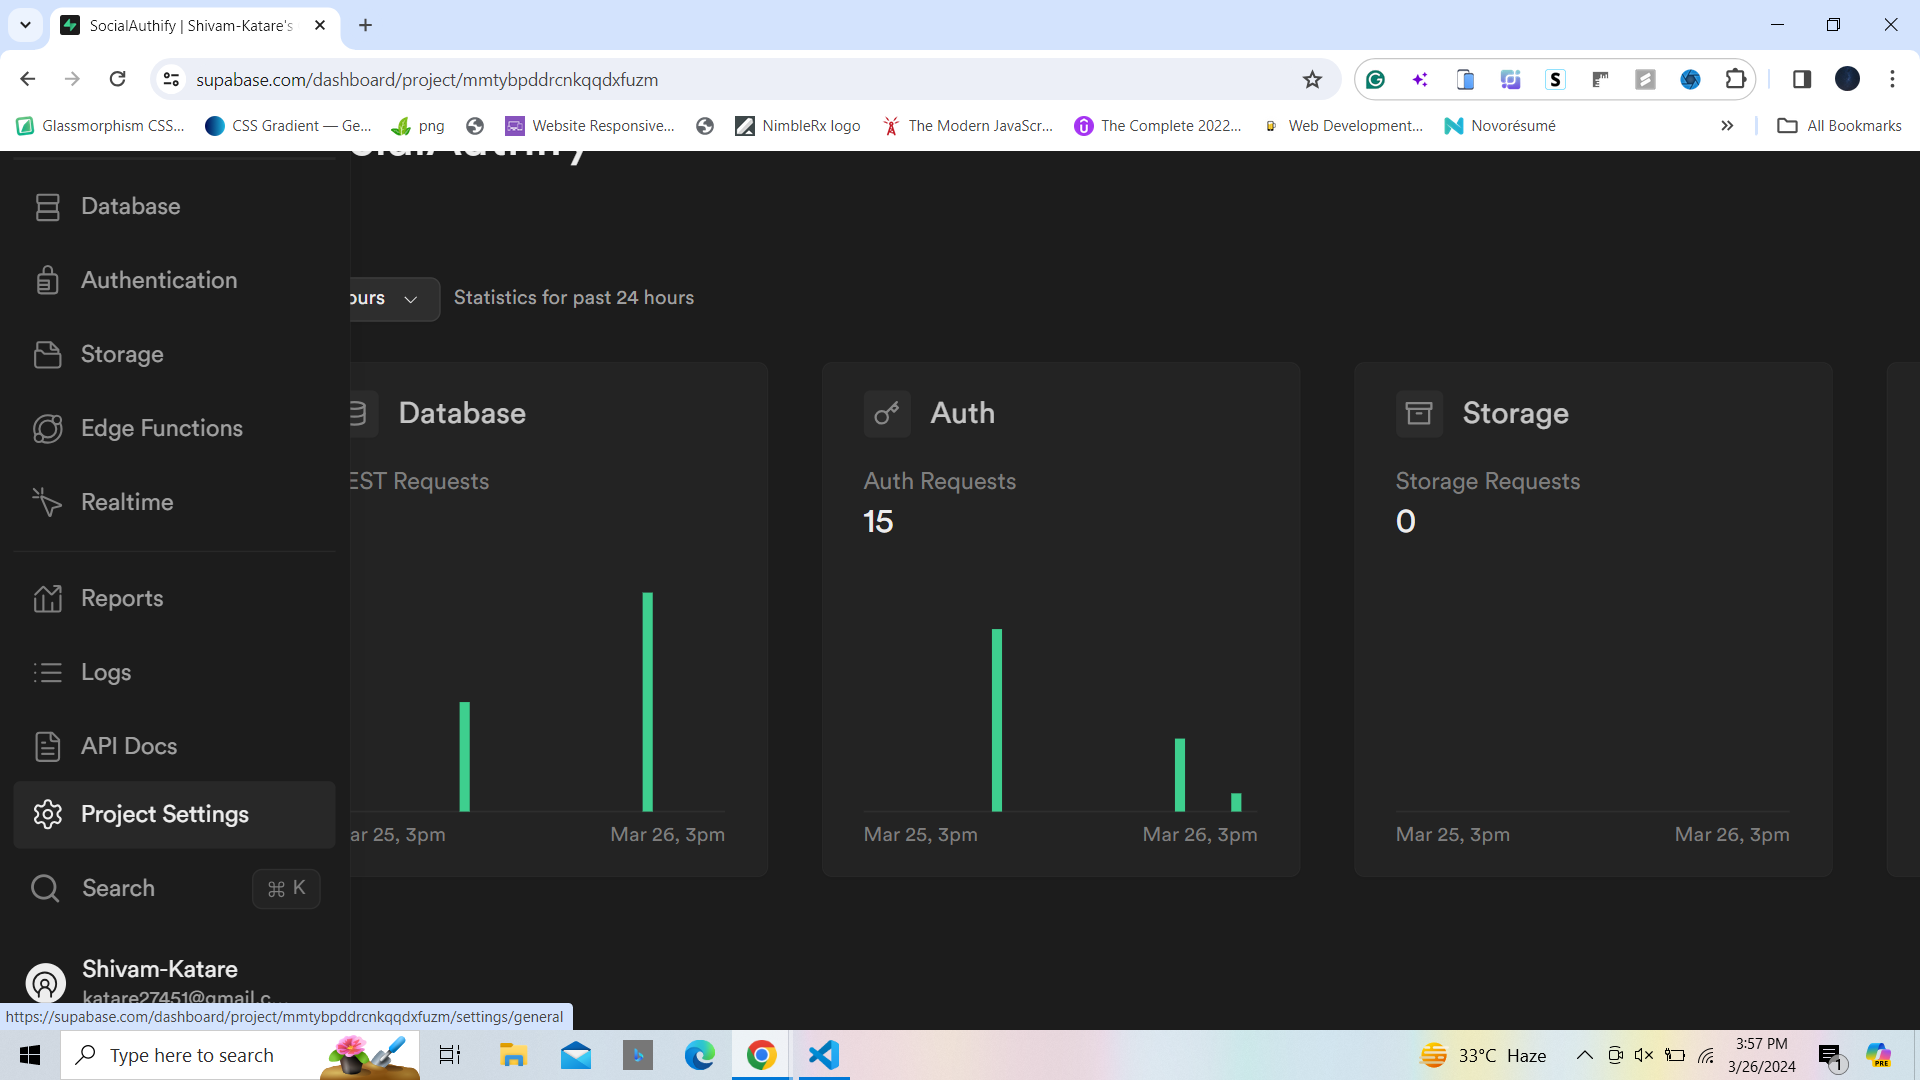
This will take you to the Supabase dashboard where you will be able to see all your build projects. In my case, I have created 2 projects already. You can work on your previous projects or create a new one. Click on the New Project button, to create a new project.
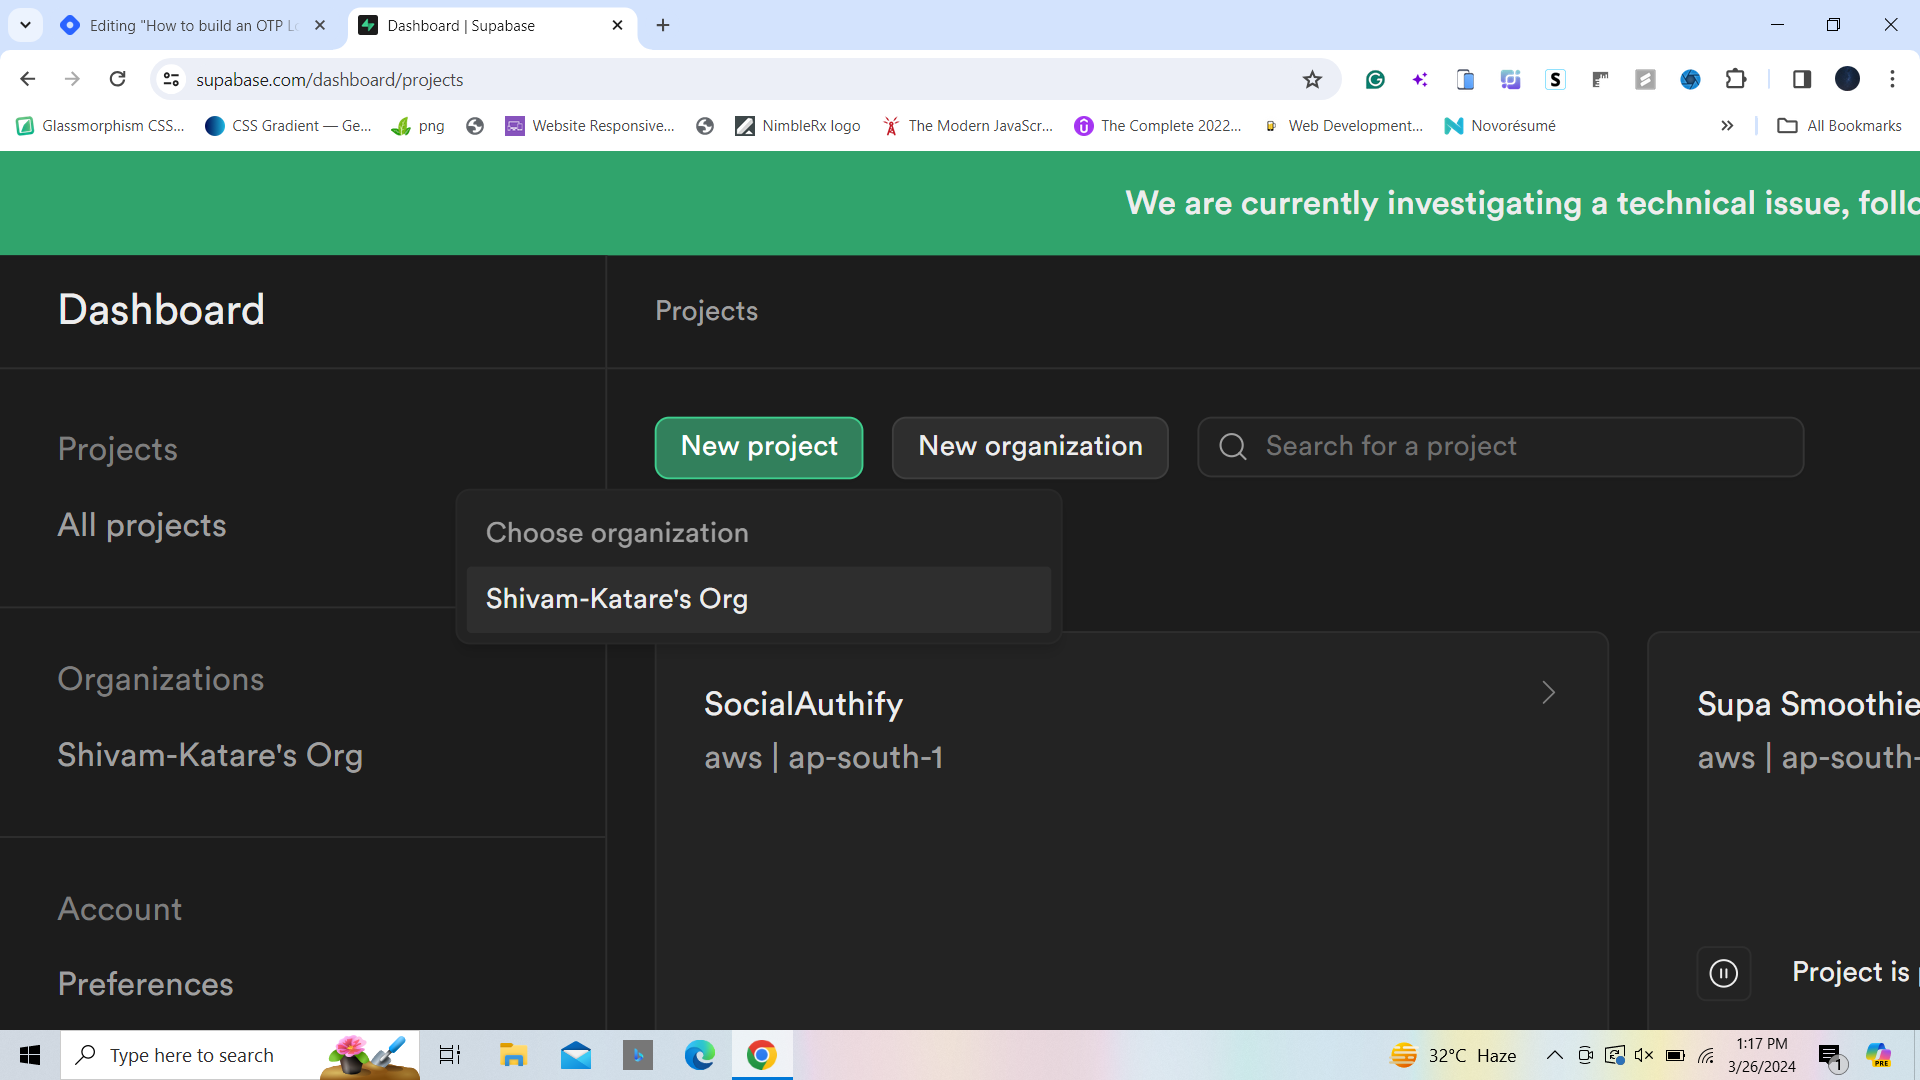
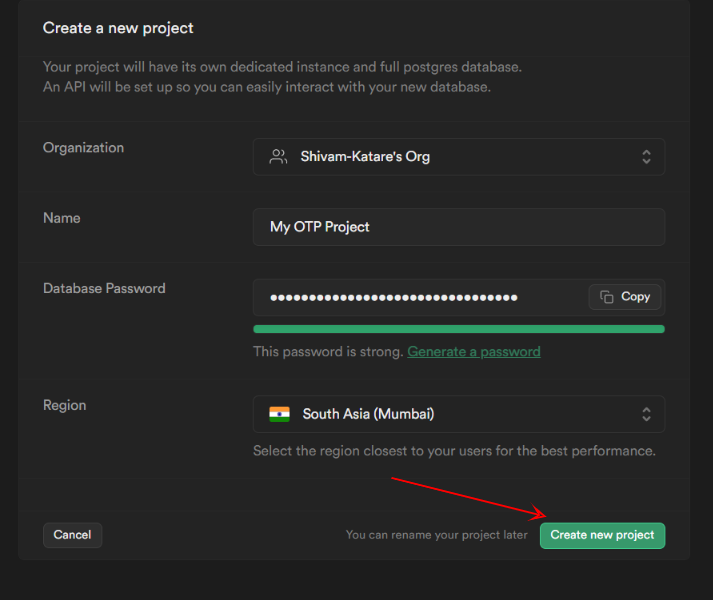
Select your organization.
And, fill out all the details at your convenience. Now click on Create a new project. Your Supabase project is now set up. You can go to your supabase dashboard to see your project details.
Project Setup
In this section, we'll set up a React project in our locals.
Set up React Project with Vite:
 npm init @vitejs/app my-react-app --template react
 cd my-react-app
Install Tailwind CSS:
npm install -D tailwindcss@latest postcss@latest autoprefixer@latestCreate Tailwind CSS Configuration File:
npx tailwindcss init -pEdit
tailwind.config.js:Modify
purge(content)property to include paths to your React components and pages. Like this 👇/** @type {import('tailwindcss').Config} */ module.exports = { content: ["./src/**/*.{html,js,jsx,ts,tsx}"], theme: { extend: {}, }, plugins: [], }Create a PostCSS Configuration File:
Create a
postcss.config.jsfile in the project root with the following content:module.exports = { plugins: { tailwindcss: {}, autoprefixer: {}, }, };Configure Vite for Tailwind CSS: Edit
vite.config.jsto include Tailwind CSS:import { defineConfig } from 'vite'; import react from '@vitejs/plugin-react'; import tailwindcss from 'tailwindcss'; import autoprefixer from 'autoprefixer'; export default defineConfig({ plugins: [ react(), ], css: { postcss: { plugins: [ tailwindcss(), autoprefixer(), ], }, }, });Install Supabase: You can install the Supabase JavaScript client via npm:
npm install @supabase/supabase-jsConfigure Supabase:
Configure Supabase by importing and initializing it in your project files. Create a JS file in the directory(I named it
supabaseClient.js).import { createClient } from '@supabase/supabase-js' const supabaseUrl = 'YOUR_SUPABASE_URL'; const supabaseAnonKey = 'YOUR_SUPABASE_KEY'; export const supabase = createClient(supabaseUrl, supabaseAnonKey)To get the key and URL, you can:
Go to your project
Click on your Project Settings
Click on the API tab and copy the URL and Anon Key
Now, paste these 2 things on your client supabase file.
Start the Development Server:
Run the following command to start the development server:
npm run dev
Login Functionality
In this section, we'll dive into the implementation details of our login functionality, which uses React for the Frontend, Supabase for authentication, Twilio for sending SMS, and react-hot-toast for displaying toast notifications.
Initializing State
We begin by initializing the necessary state variables using React's useState hook. These variables include:
phoneNumber: Stores the user's phone number input.otp: Stores the OTP (One-Time Password) input.isOtpSent: Tracks whether an OTP has been sent to the user's phone.timer: Tracks the countdown timer for OTP expiration.
const [phoneNumber, setPhoneNumber] = useState('');
const [otp, setOtp] = useState('');
const [isOtpSent, setOtpSent] = useState(false);
const [timer, setTimer] = useState(60);
Send OTP Message
Now, we set our states, now before writing functions to send and verify OTP, we need to enable the Phone Login functionality from Supabase and we'll use Twilio because Twilio is a popular communication platform that provides services like SMS, voice, and video communication APIs. Supabase uses Twilio's SMS service to send OTP (One-Time Password) messages to users' mobile phones during the phone login process.
- Go to your Supabase Project's Authentication Section. Then, click on this
Providers
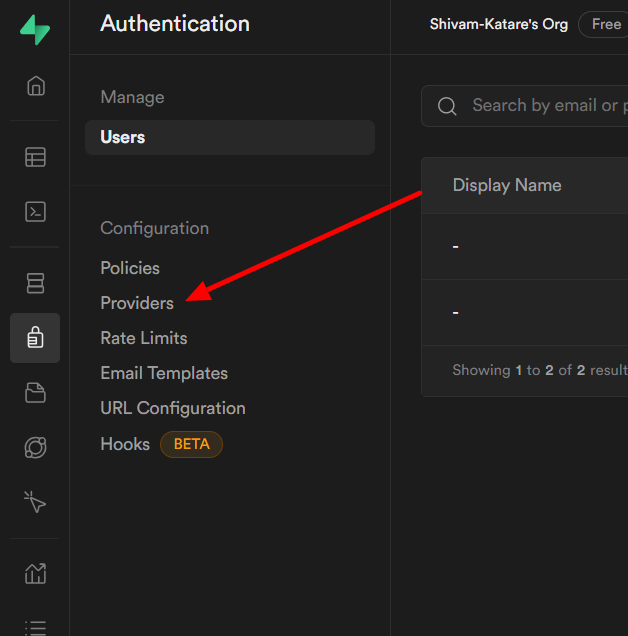
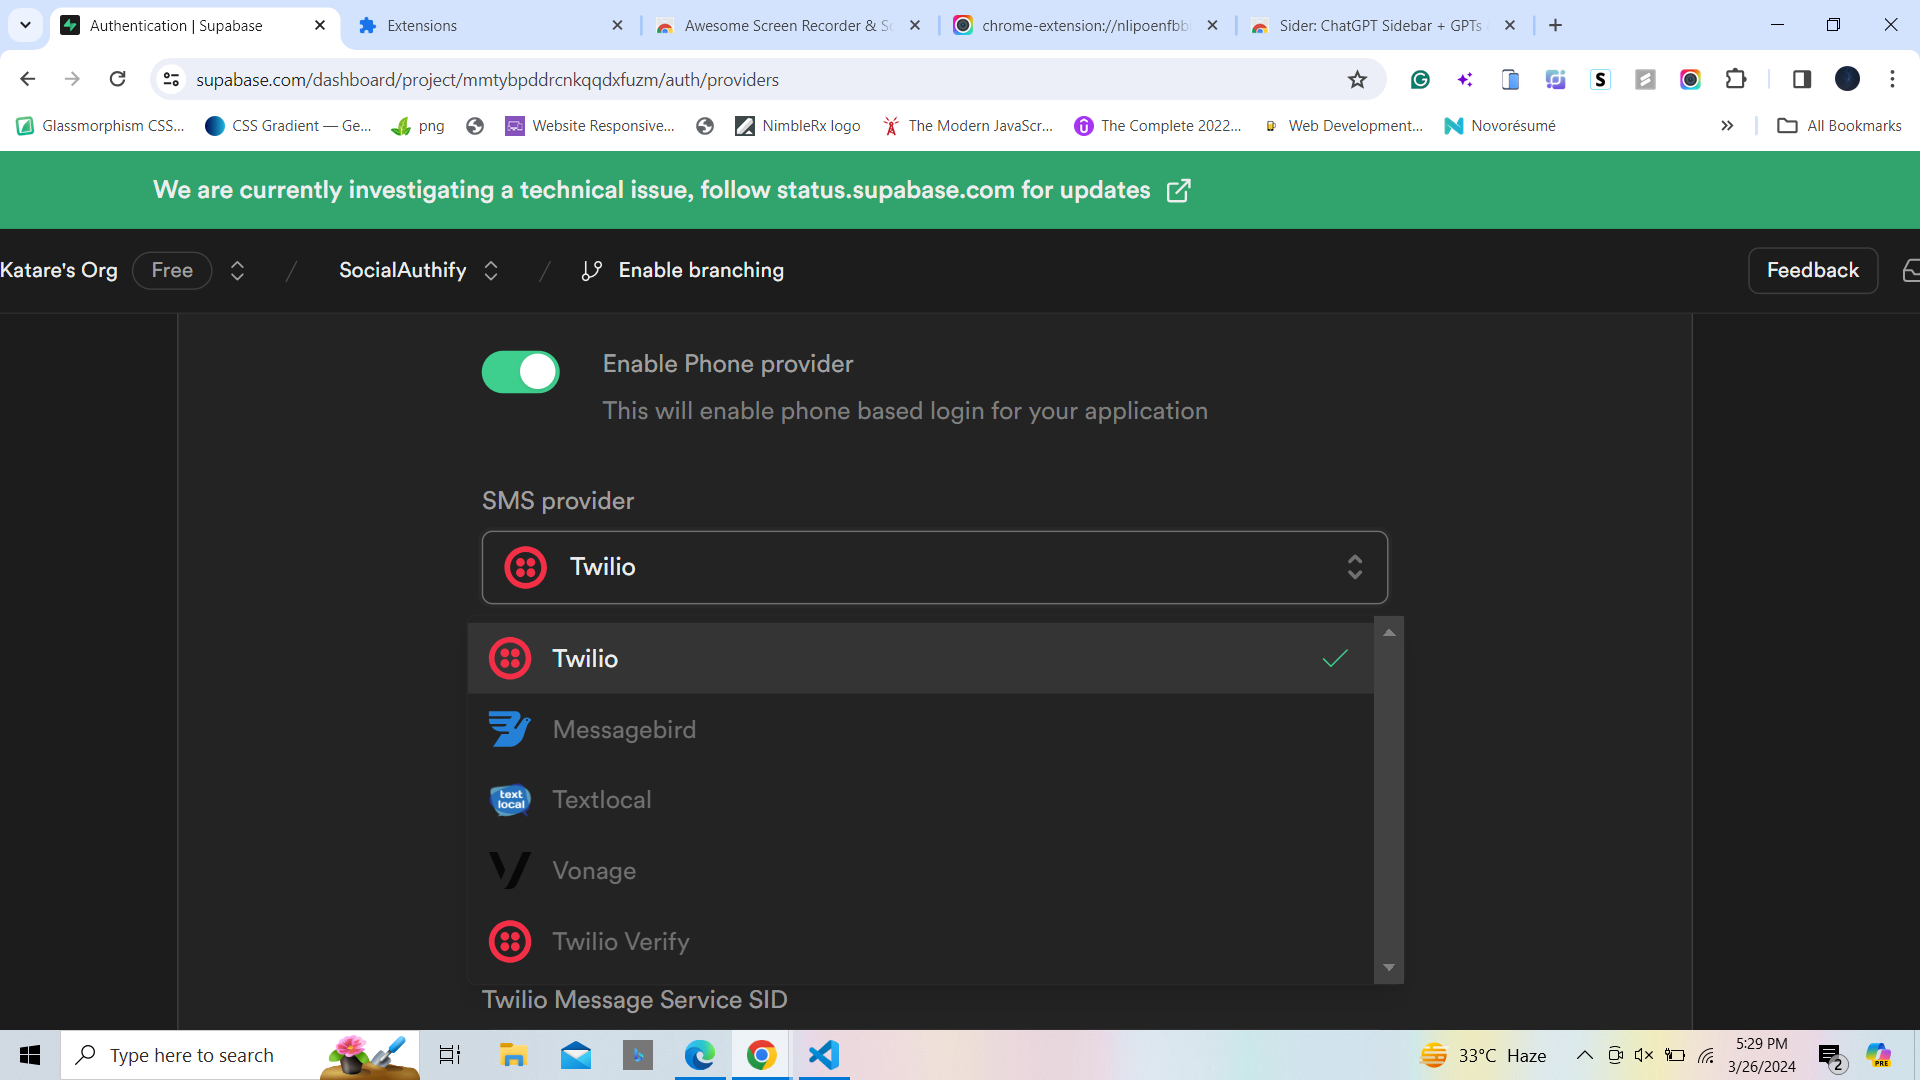
Now, click on Phone Provider and enable it.
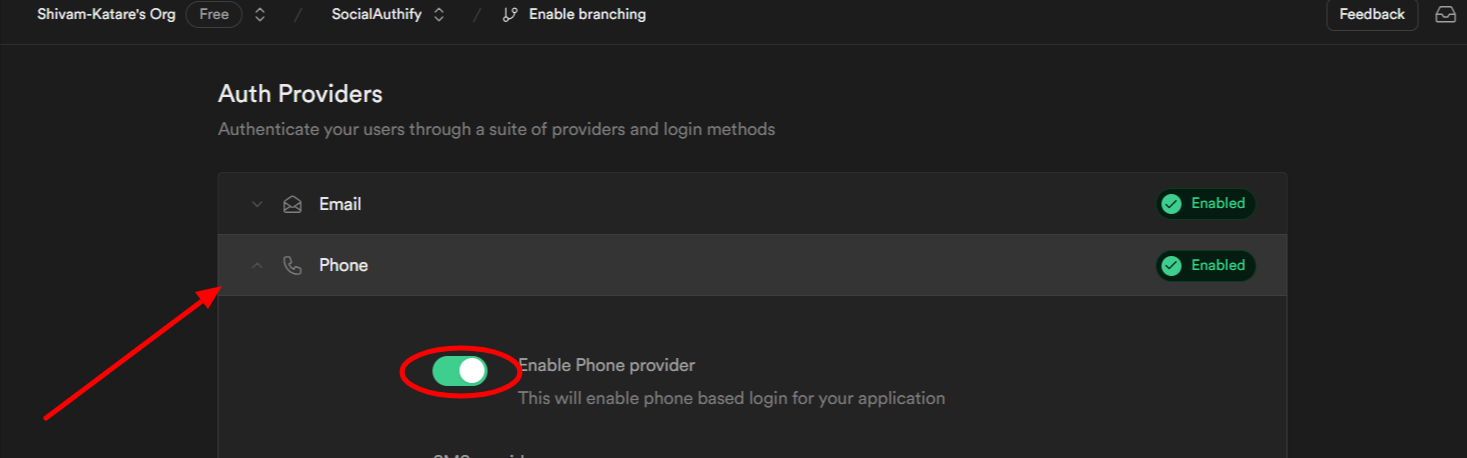
Now click on the Twilio dropdown and select the Twilio Verify option(last one).
Now we need to fill out all these Twilio details. To do this, go to Twilio and log in/Sign up there with your email ID.
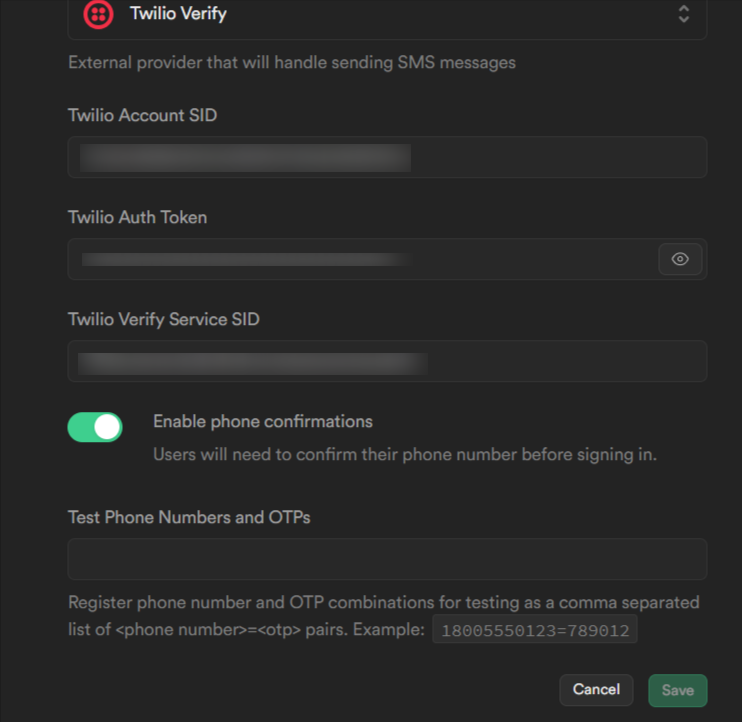
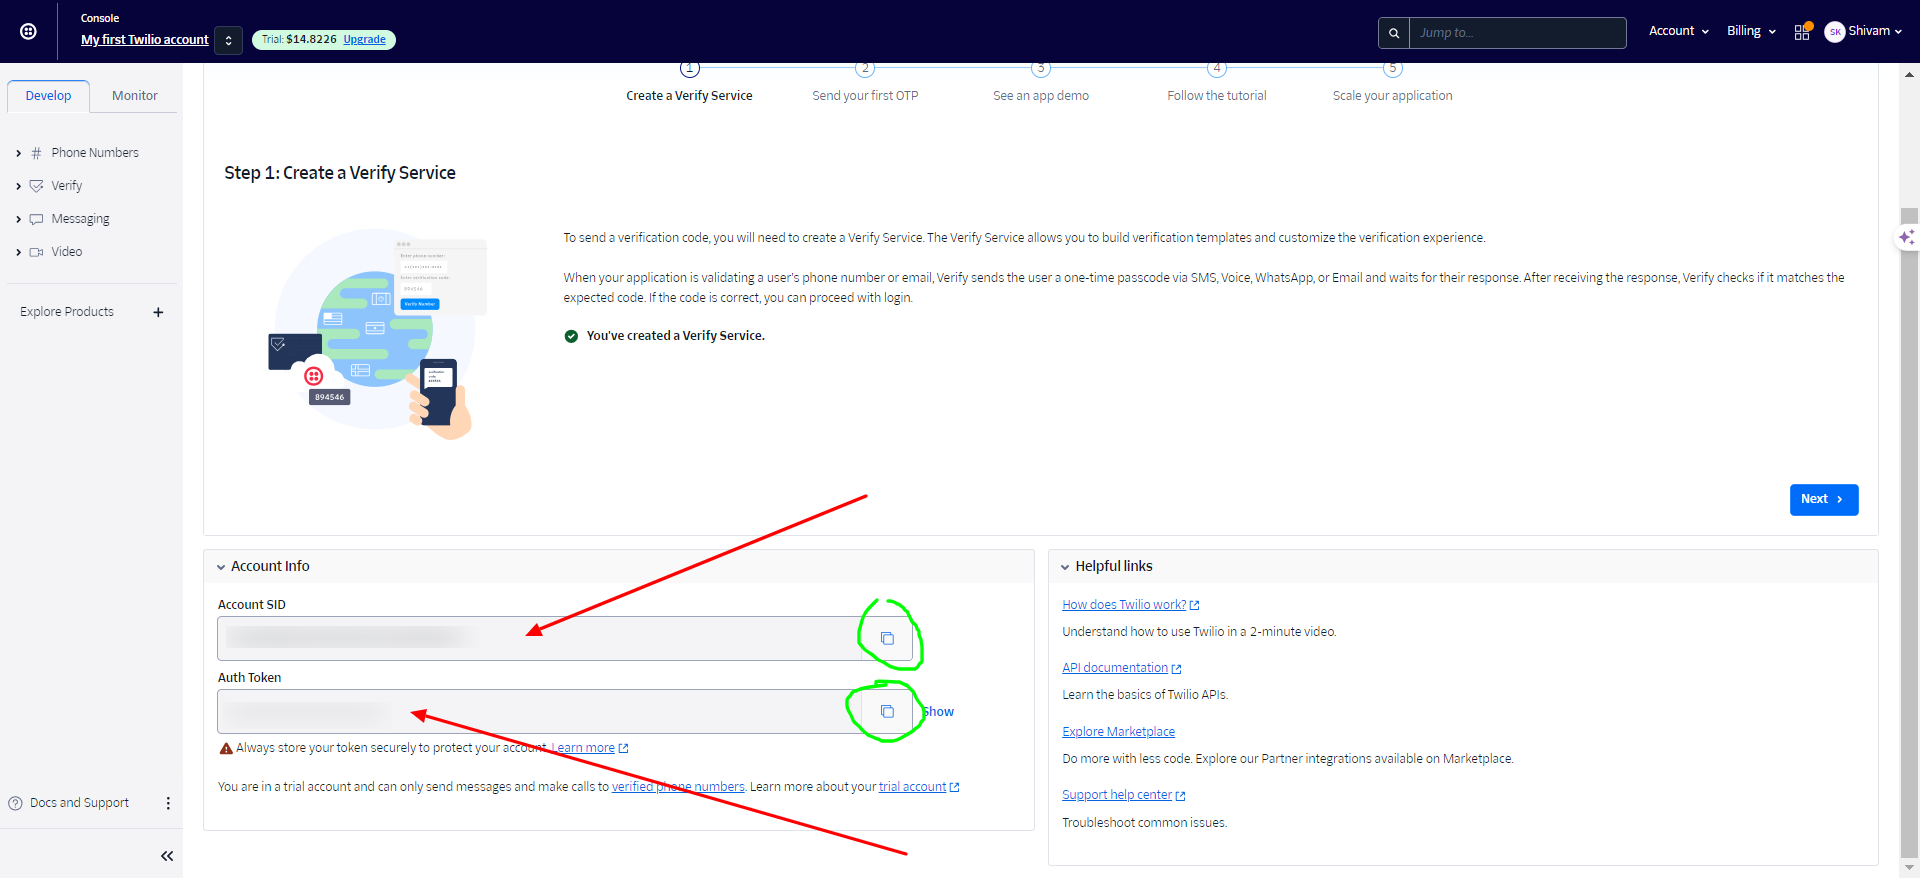
Go to your Twilio Console, and copy Account SID and Auth Token. Paste it over your Supabase.
To get the Twilio Service SID, click on the left side of your Twilio console, click on Verify, and then, Services.
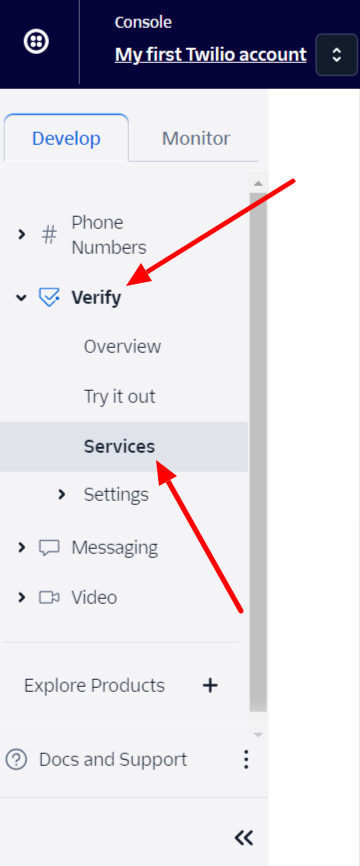
You can copy the Service ID if you already have one or create a new one.
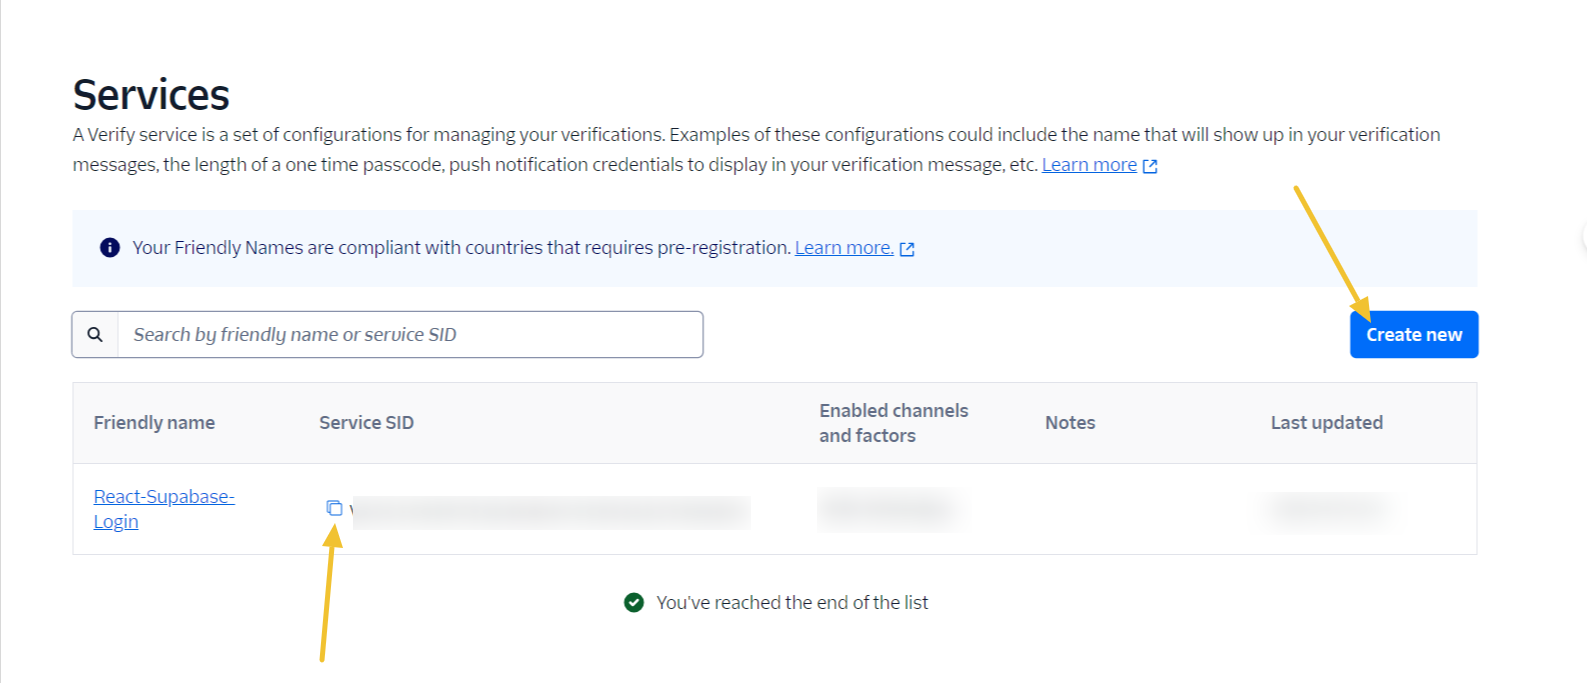
Now, click on the Create New button and fill in all the details
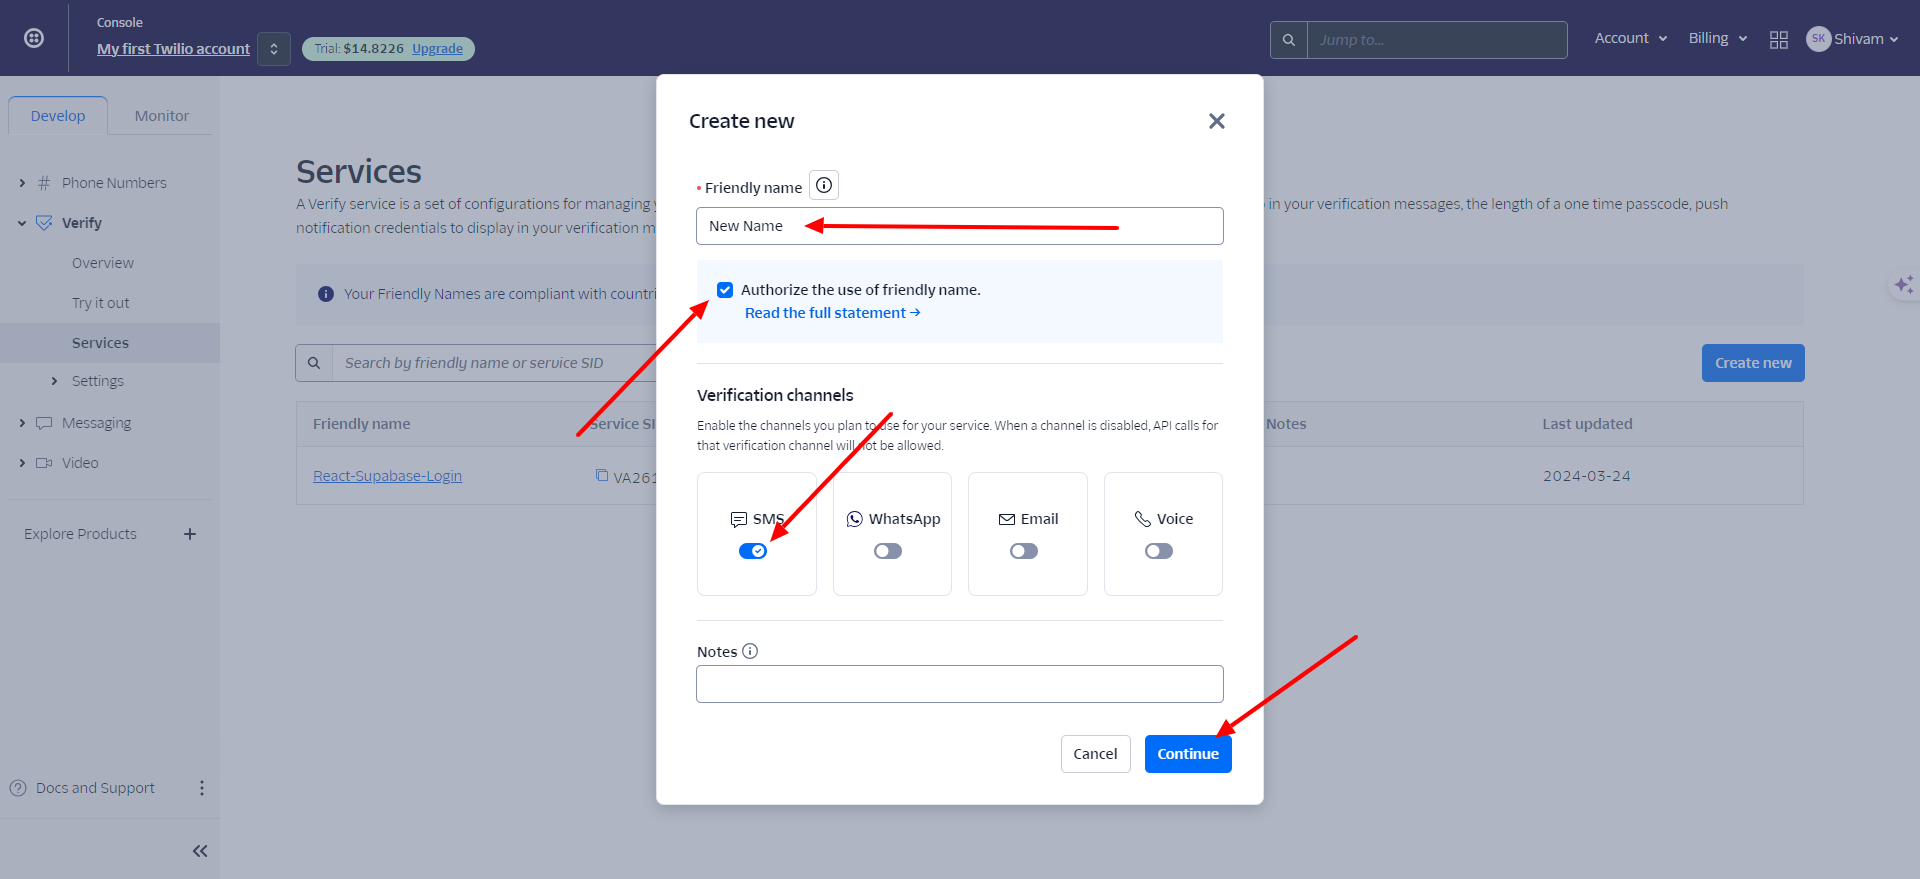
Now, select Yes, click on the Continue button
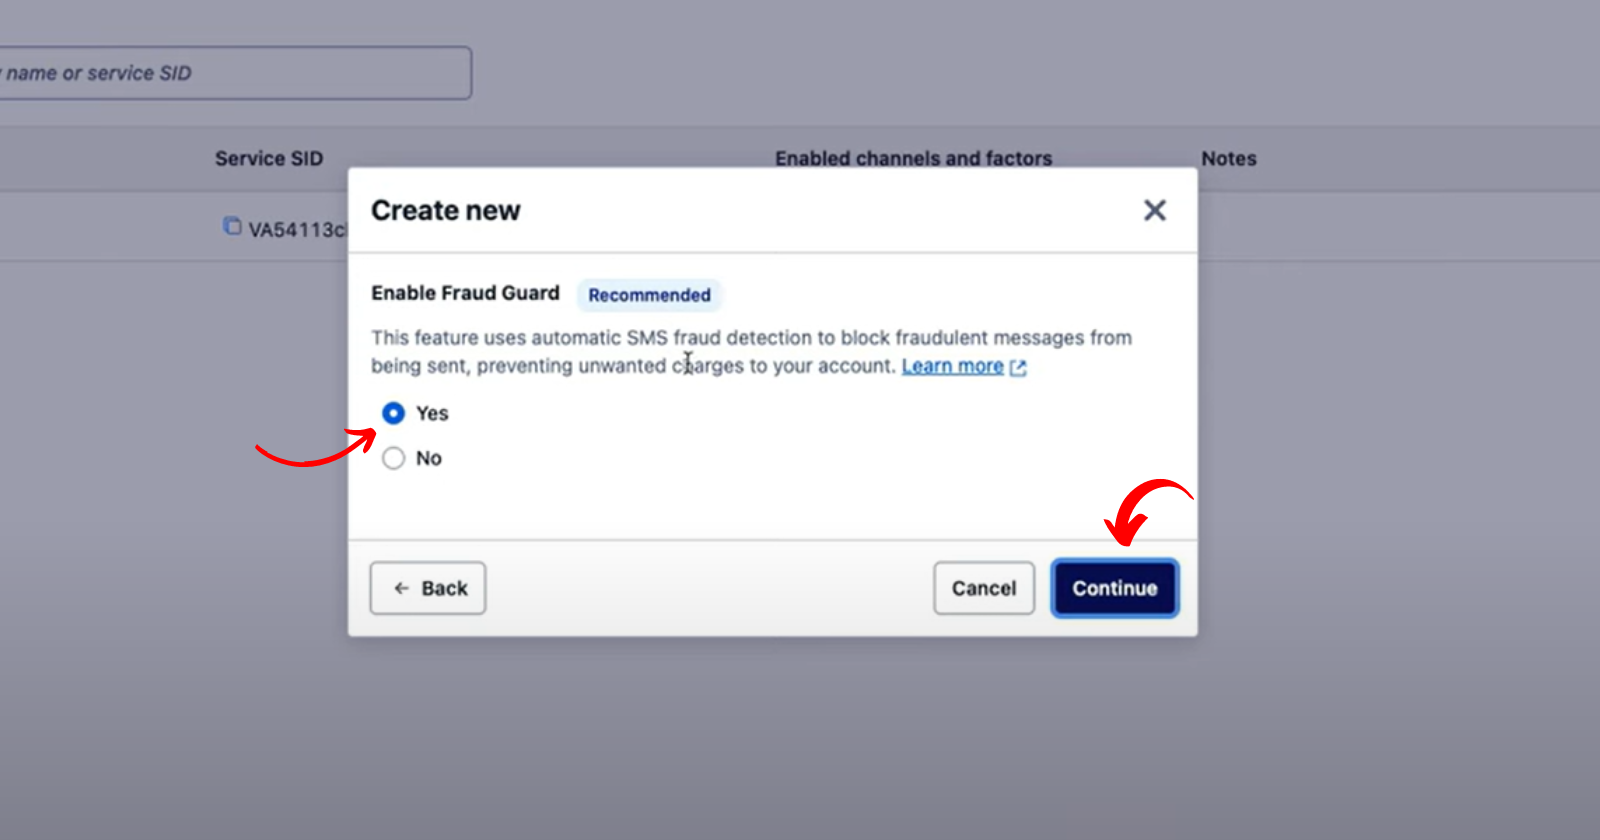
Our service ID is created now. Copy the ID and paste it over Supabase. Now click on the Save button.
Now, let's dive into the code responsible for sending the OTP (One-Time Password) message to the user's phone. This functionality ensures a smooth and secure login process for our application users.
Setting up Countdown Timer
To provide a seamless user experience and ensure the OTP remains valid for a limited time. This timer ticks down from 60 seconds once the OTP is sent to the user's phone. Let's break down the logic behind this countdown timer:
  useEffect(() => {
    let interval;
    if (timer > 0 && isOtpSent) {
      interval = setInterval(() => {
        setTimer((prevTimer) => prevTimer - 1);
      }, 1000);
    } else if (timer === 0 && isOtpSent) {
      setOtpSent(false);
      setTimer(60);
    }
    return () => clearInterval(interval);
  }, [timer, isOtpSent]);
We used the
useEffecthook to manage the countdown timer. This hook runs whenever thetimerorisOtpSentstate variables change.If the timer is greater than 0 and an OTP has been sent (
isOtpSentis true), we set up an interval to decrease the timer by 1 every second.When the timer reaches 0 and an OTP has been sent, we reset the
isOtpSentstate to false and restore the timer to 60 seconds.Finally, we return a cleanup function to clear the interval when the component unmounts, preventing memory leaks.
Initiating OTP Sending
The sendOtp function is responsible for initiating the OTP sending process when the user clicks the "Log in" button:
    async function sendOtp() {
      try {
        const { error } = await supabase.auth.signInWithOtp({ phone: phoneNumber });
        if (error) {
          throw new Error(error.message);
        }
        setOtpSent(true);
      } catch (error) {
        toast.error('Error sending OTP: ' + error.message);
      }
    }
Upon clicking the "Log in" button, this function calls
supabase.auth.signInWithOtp, passing the user's phone number as a parameter.If an error occurs during this process, it throws an error, which is caught by the
catchblock. A toast notification is then displayed to notify the user of the error.
Handling OTP Verification
Once the OTP is sent and entered by the user, the verifyOtp function handles the verification process:
    async function verifyOtp() {
      try {
        const { error } = await supabase.auth.verifyOtp({
          phone: phoneNumber,
          token: otp,
          type: 'sms',
        });
        if (error) {
          throw new Error(error.message);
        }
      } catch (error) {
        toast.error('Invalid OPT. Please enter a valid OTP.');
      }
    }
When the user clicks the "Login" button, this function calls
supabase.auth.verifyOtp, passing both the phone number and OTP as parameters.If the OTP is invalid or an error occurs during the verification process, a toast notification is displayed to alert the user.
User Interface
Let's explore the user interface (UI) elements implemented in our login component.
Phone Number Input
    <input
      className="rounded-lg border p-2 mb-4"
      type="tel"
      value={phoneNumber}
      onChange={(e) => setPhoneNumber(e.target.value)}
      placeholder="Phone number"
    />
This input field allows users to enter their phone numbers.
It is styled using Tailwind CSS classes to have rounded corners, a border, and padding for a clean appearance.
The value of the input field is controlled by the
phoneNumberstate variable, ensuring synchronization between the UI and the state.
OTP Input and Timer Display (Conditional Rendering)
    {isOtpSent && (
      <div className="flex items-center mb-4">
        <input
          className="rounded-lg border p-2 mr-2"
          type="number"
          value={otp}
          onChange={(e) => setOtp(e.target.value)}
          placeholder="OTP"
        />
        <span className="text-gray-600">{timer}s</span>
      </div>
    )}
This section is conditionally rendered based on whether an OTP has been sent (
isOtpSentis true).It displays an input field for entering the OTP and a countdown timer showing the time remaining before the OTP expires.
Similar to the phone number input, the OTP input field's value is controlled by the
otpstate variable.
Login Button
    <button
      className="bg-blue-500 hover:bg-blue-700 text-white font-bold py-2 px-4 rounded"
      onClick={isOtpSent ? verifyOtp : sendOtp}
    >
      {isOtpSent ? 'Verify OTP' : 'Log in'}
    </button>
This button serves a dual purpose: initiating OTP sending when no OTP has been sent, and verifying the OTP when one has been sent.
Its appearance is customized using Tailwind CSS classes for background color, hover effect, text color, font weight, padding, and border radius.
Toast Notifications
<Toaster />
The
Toastercomponent fromreact-hot-toastis included to display toast notifications.These notifications provide feedback to the user, informing them of the success or failure of OTP sending and verification operations.
Dashboard Page
Let's dive into the implementation of the Dashboard page in our application. This page is used as a central hub for users.
Dashboard Component (dashboard.jsx)
import React from 'react';

function Dashboard() {
  return (
    <div className="flex flex-col items-center justify-center min-h-screen">
      <h1 className="text-3xl font-semibold mb-6">Welcome to the Dashboard</h1>
    </div>
  );
}

export default Dashboard;
The
Dashboardcomponent renders a central layout with content aligned at the center vertically and horizontally (flex-col,items-center,justify-center).It displays a welcoming message using a heading element (
h1) styled with Tailwind CSS classes for text size, font weight, and margin-bottom.
App Component (App.jsx)
import { useEffect, useState } from 'react';
import './App.css';
import Login from './components/SendEmail/Login';
import { supabase } from './supabaseClient';
import Dashboard from './components/SendEmail/Dashboard';

function App() {
  const [session, setSession] = useState(null)

  useEffect(() => {
    setSession(supabase.auth.signInWithOtp())

    supabase.auth.onAuthStateChange((_event, session) => {
      setSession(session)
    })
  }, [])

  return session ? <Dashboard /> : <Login />
}

export default App;
The
Appcomponent serves as the entry point for our application.It utilizes React's
useStateanduseEffecthooks to manage the user session state.In the
useEffecthook, it initializes the user session usingsupabase.auth.signInWithOtp()and sets the session state accordingly.Additionally, it subscribes to changes in the authentication state using
supabase.auth.onAuthStateChange, updating the session state when changes occur.Based on the session state, it conditionally renders either the
Dashboardcomponent or theLogincomponent.
With these components in place, our application seamlessly directs users to the Dashboard upon successful authentication, providing them with a streamlined and intuitive user experience.
Testing
Now, everything has been implemented. It's time to test out the application. Open your localhost server. The will look like this:

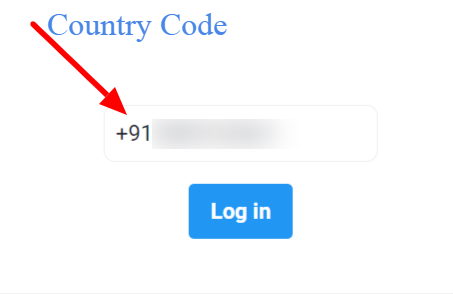
Enter your mobile number with your country code. Like this 👇 and click on Login.
Now, you can check your phone to get the OTP.
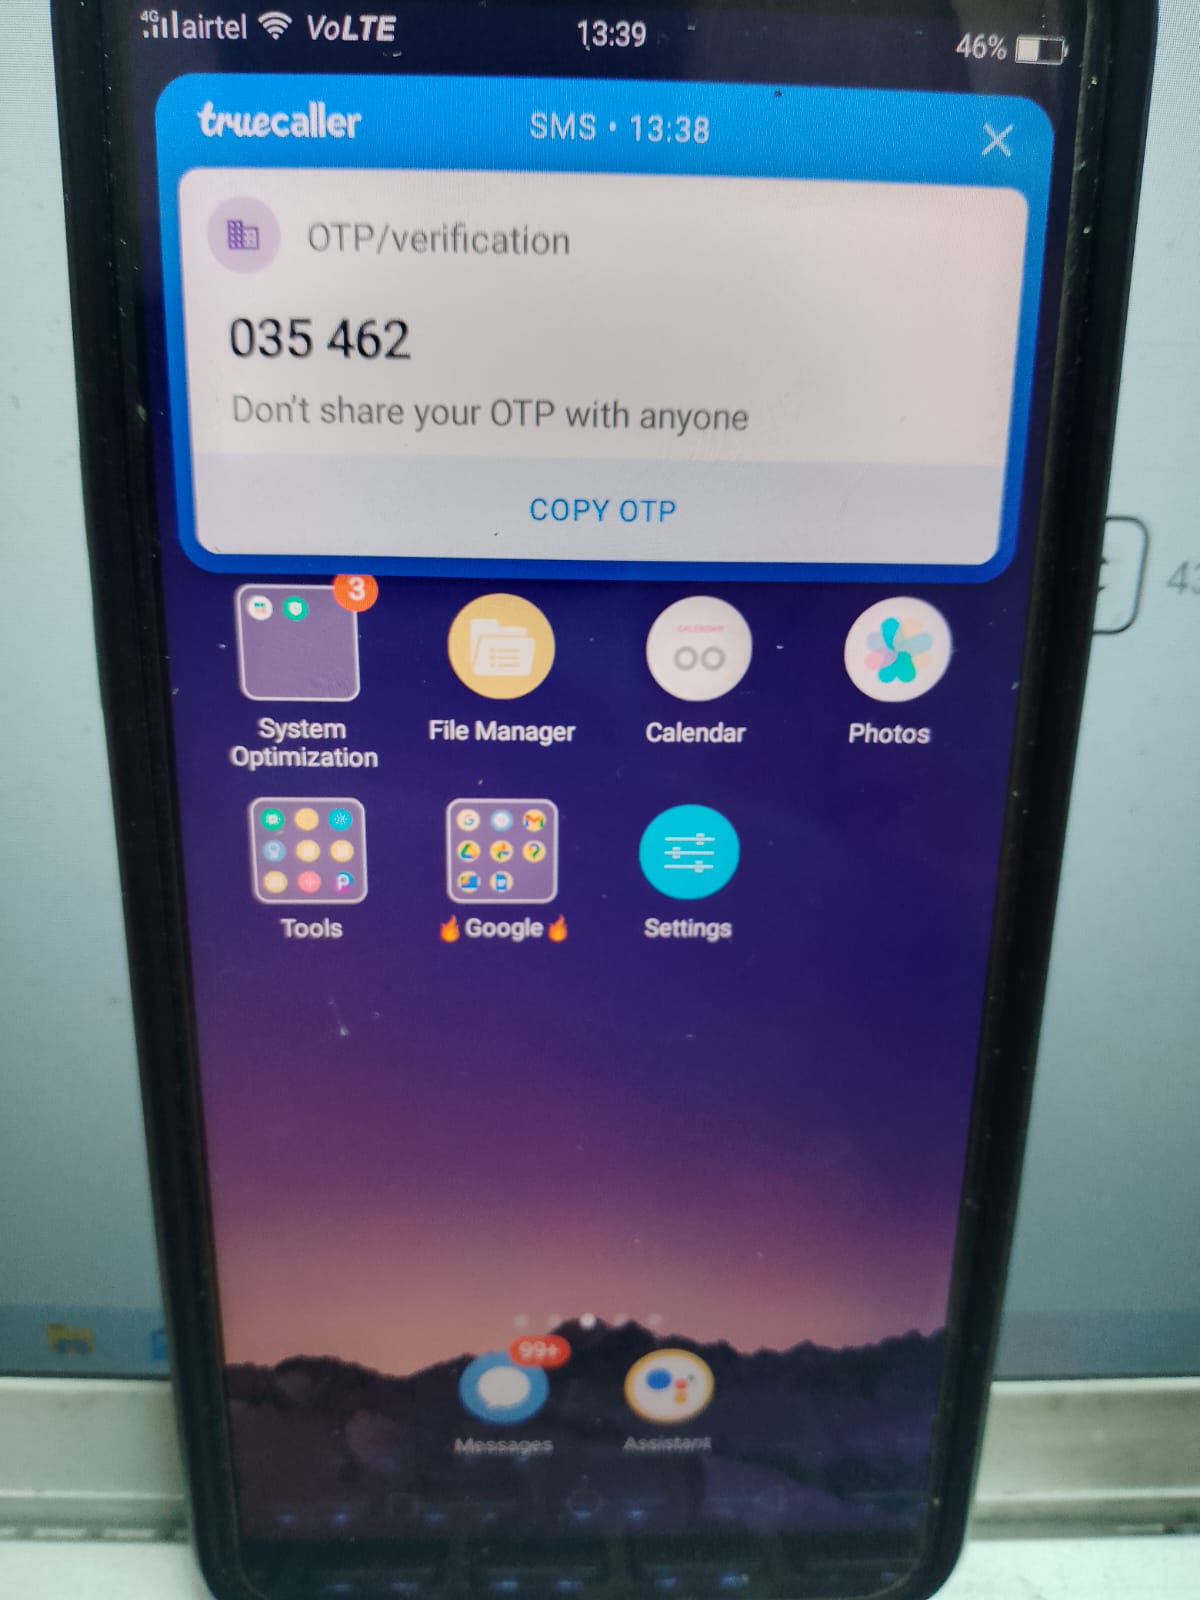
Enter your OTP here before the timer ends else, it will send the new OTP again after 60seconds
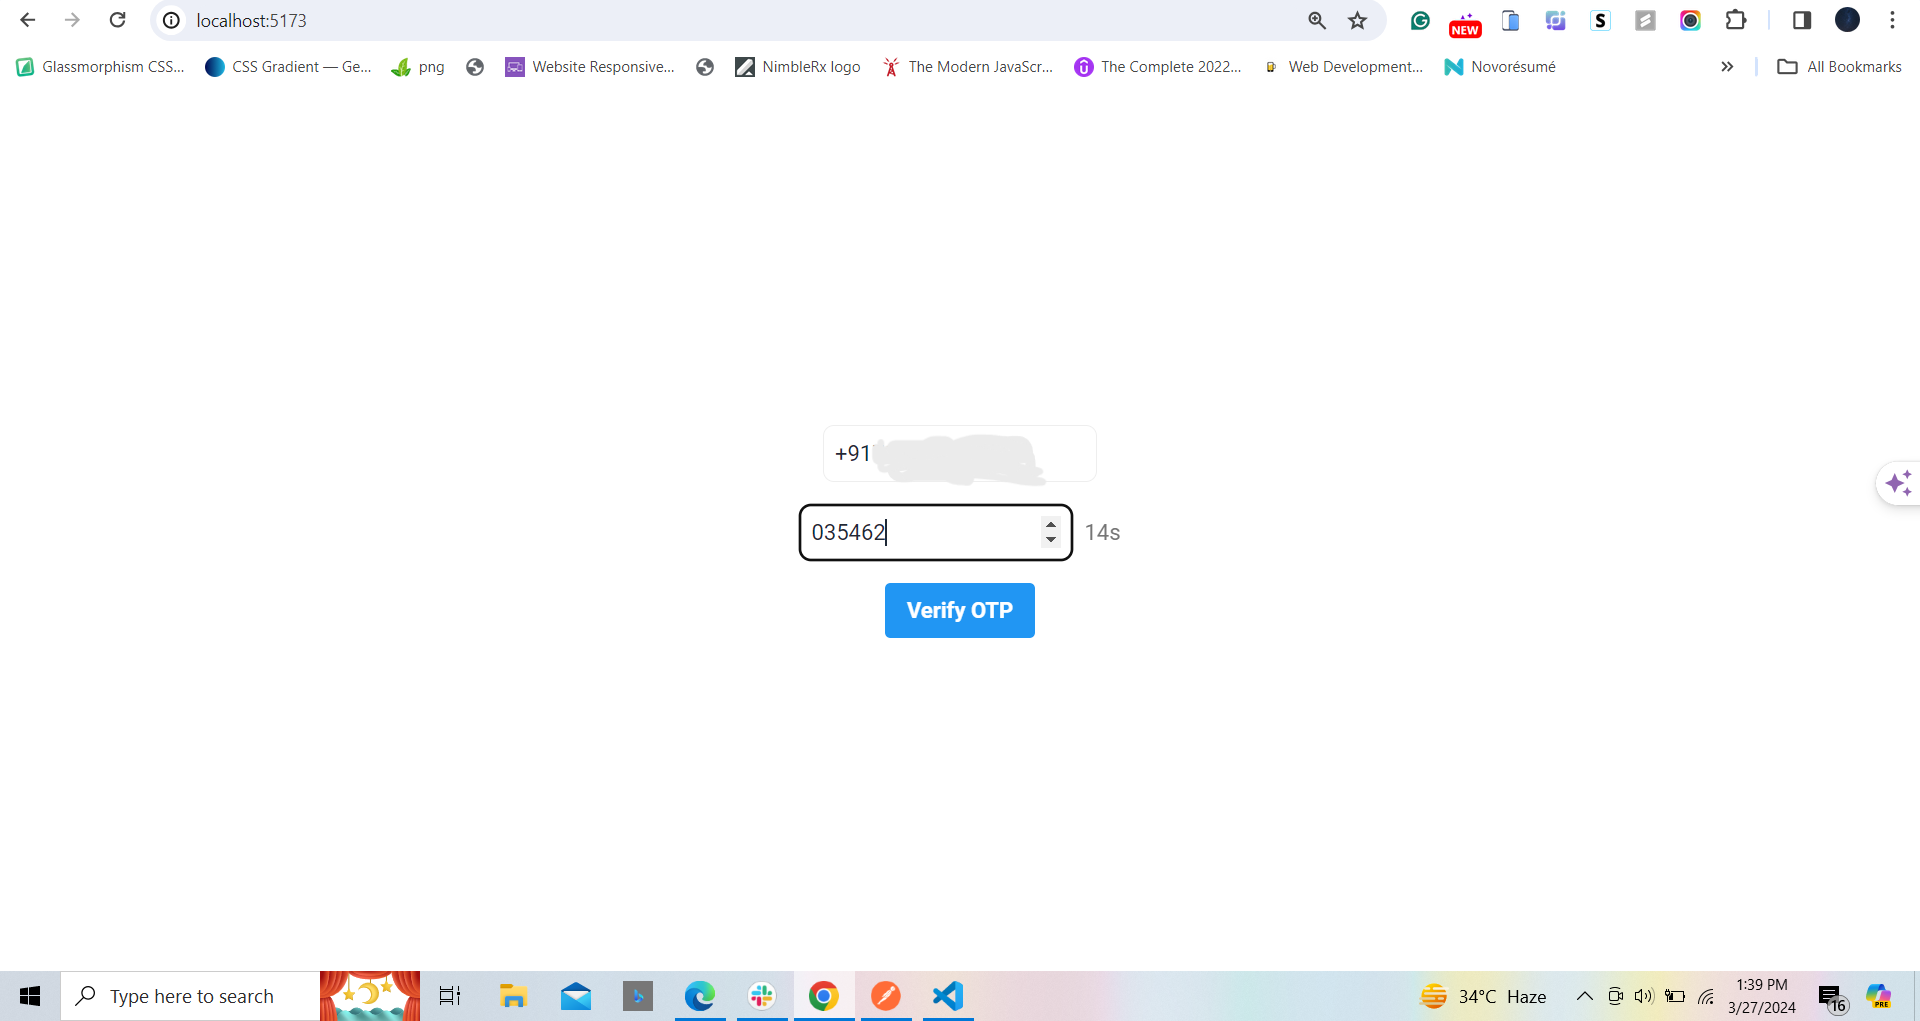
Now click on Verify OTP. If OTP is correct, you'll be redirected to Dashboard.
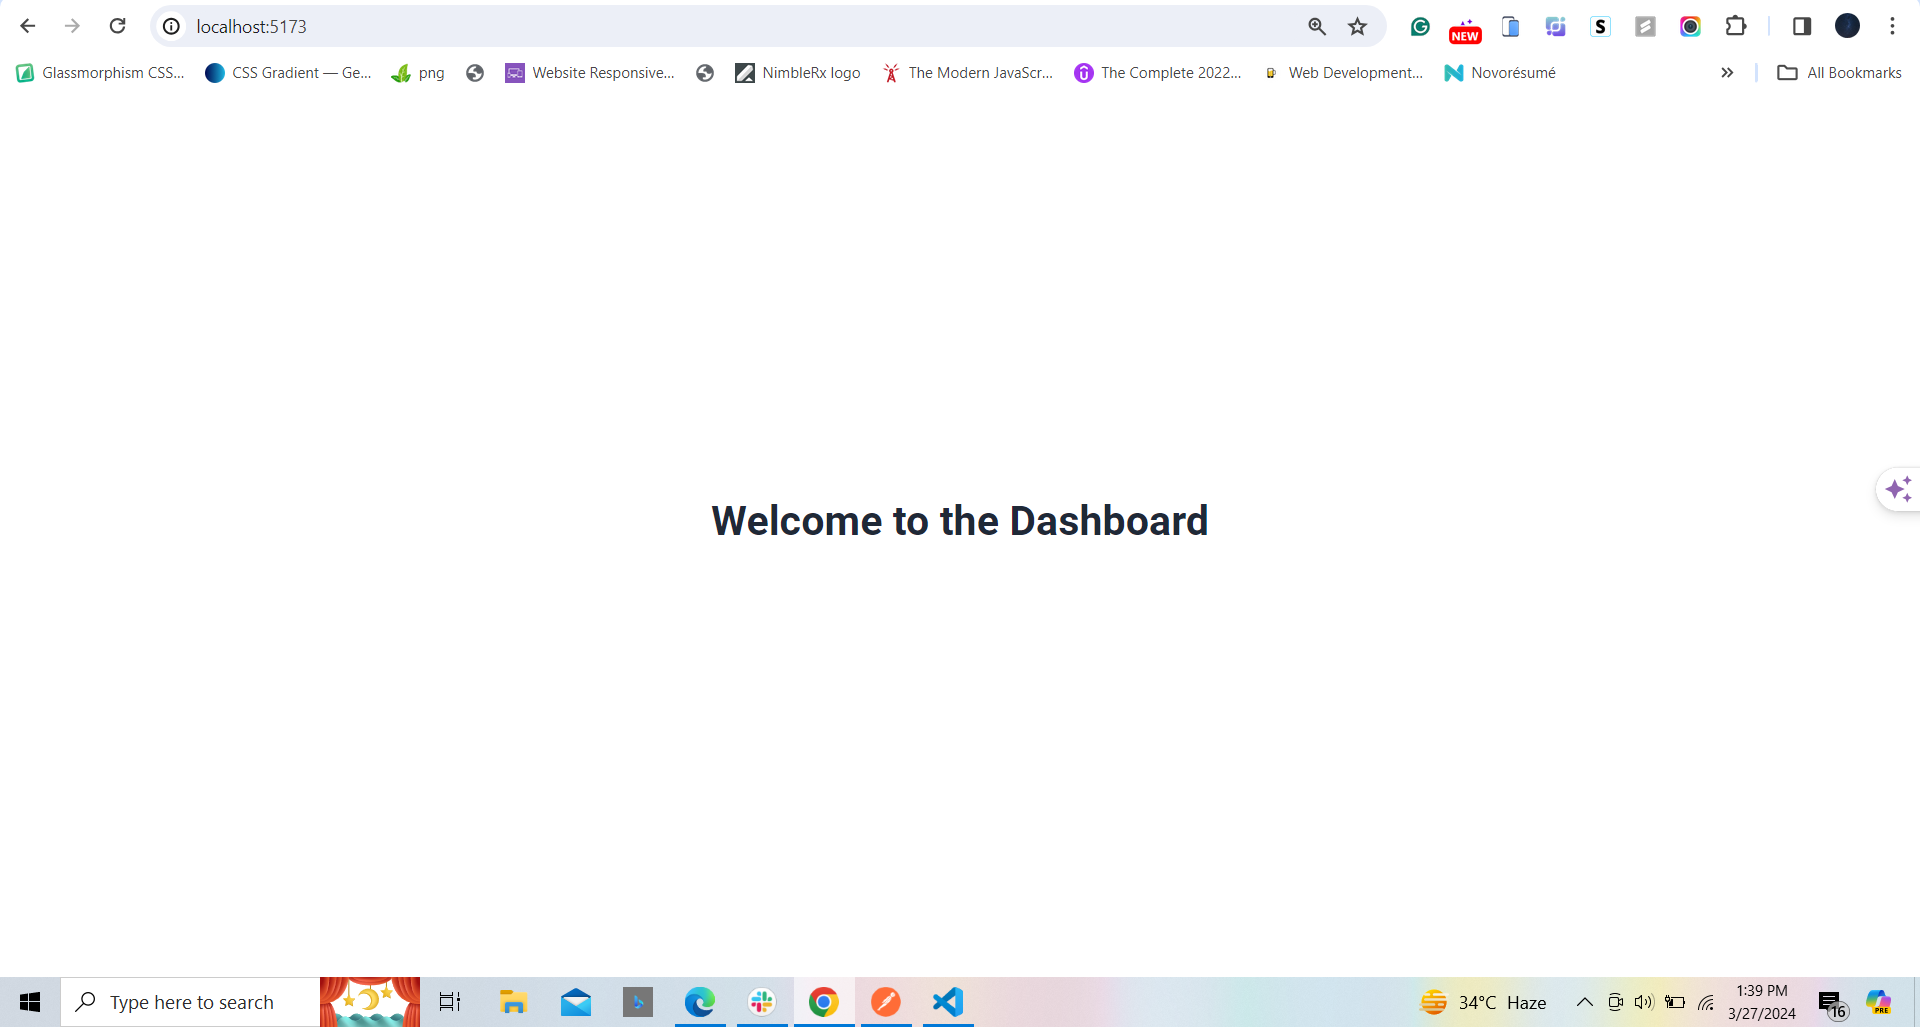
And that's it 😃. We have integrated the OTP Login Authentication in our app. But one big thing is left.
What's Left?
Currently, you'll be able to see this error message if you enter a number apart from your Twilio-registered mobile number
Error sending OTP: Error sending confirmation sms: The phone number is unverified. Trial accounts cannot send messages to unverified numbers; verify it at twilio.com/user/account/phone-numbers/verified
So, if you enter a number that is not mentioned here you'll see the above error message. Because it is only required to verify numbers that you want to send SMS to when your account is in trial mode. If you upgrade your account you will be able to send SMS messages to any number.

So, you can add numbers here manually or integrate Twilio's API with Supabase's signup process to automatically save users' phone numbers as verified numbers in Twilio. We'll cover this sign-up process part in our next blog.
For More reference, You can check this doc as well.
Conclusion
In this blog, we've covered:
How to use Supabase Phone Login provider
About Twilio's SMS services
We implemented the UI using React + Vite, and Tailwind CSS
We covered what to do next steps.
If you found this blog post helpful, don't hesitate to share it with others. You can connect with me on Twitter, LinkedIn, and Github. I share about JavaScript, React, Next JS, Open Source, and other web development topics.
Thanks for reading! :) I'll see you in the next one. 😃


