


Hello People, Today I am gonna tell you about JSX in React.
What is JSX?
Why we should use JSX?
JSX Variables, Comments, Booleans.
JSX Loops
JSX Conditions and many more.
What is JSX?
In simple terms, JSX is the combination of Html + JavaScript. It is a JavaScript extension syntax. JSX helps us to write the "HTML" and "JavaScript" code together. Here is some code example of JSX.
const variableName = <h2> I am learning JSX </h2>
The above code is written in JSX where we declare a variable and initializes its value, Now, the value which we initialize is not any "String", "Integer" or "Boolean" value but, here we assign a whole "HTML" tag with some text in it. Now, this code will be going to throw an error because the browser does not understand this JSX. After all, it's not valid JavaScript code.
So, now we have to convert it into valid javaScript code from which our browser will easily understand this code. We use a tool like Babel(which converts JSX into JavaScript) which is a JavaScript Compiler.
In this article, we will be going to use create-react-app which internally uses Babel for JSX to JavaScript conversion.
So, for the React setup, run these three commands in your terminal. I am using VS code here.
npx create-react-app my-app
cd my-app
npm start
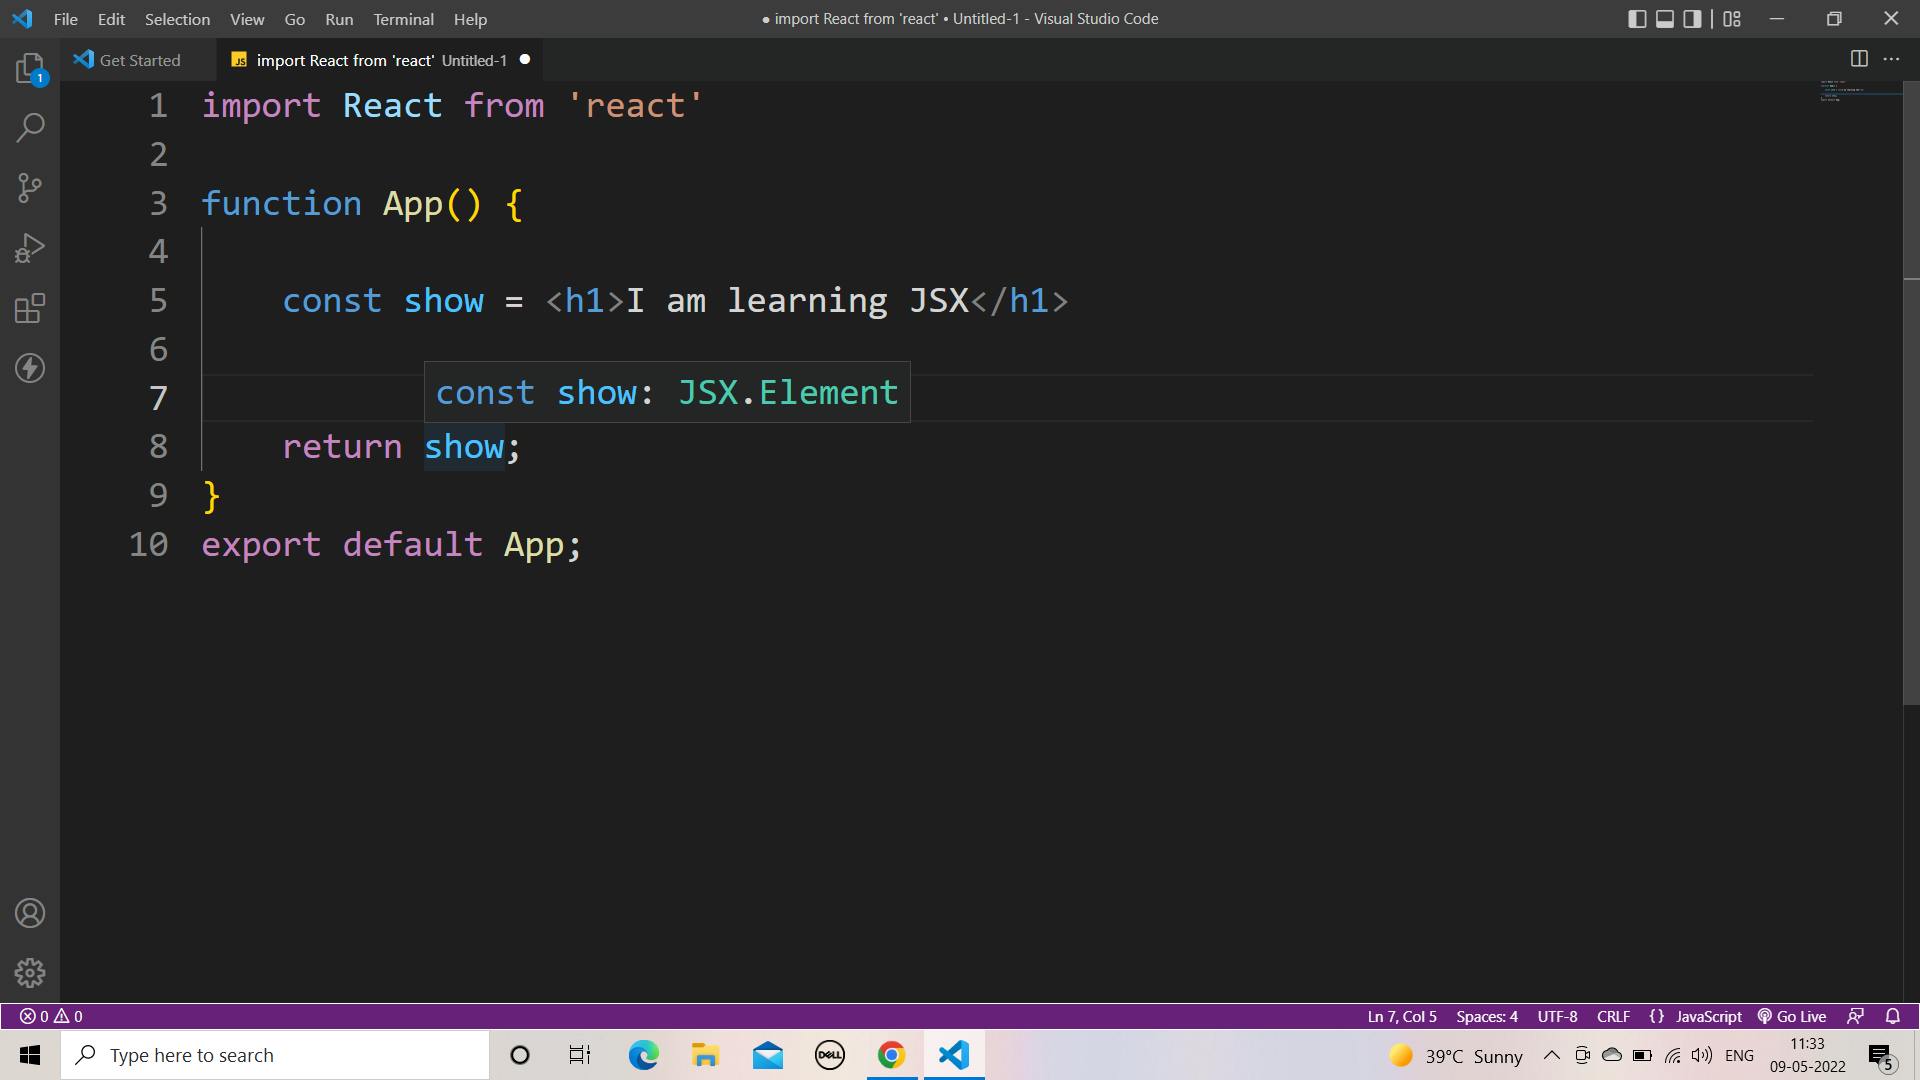
Now, after the setup, in your App.js file let's run the below code.
import React from 'react'

function App() {
    const show = <h1>I am learning JSX</h1>
    return show;
}
export default App;
Here, we have a constant variable name"show" which has some value and, we are returning that variable. So, when you hover on a "show" you can see that it shows you that it's a JSX element.
So, writing JSX is super easy(you just need to understand some terms) now, I think you understand what "JSX" is, now let's understand why we need it.
Why do we need JSX?
Let's understand it with the above code.
Now, the above code will go to your "index.js" file and in that file, it will go inside
React.createElement and this will gonna look like this👇
render() {
        return React.createElement("h1", null, "I am learning JSX");
    }
This was the old way of writing code in React. Here every time you want to execute any code you have to write "React.createElement", that's why we use JSX in React which is an easy way to write Html and JavaScript together and, we can easily execute our code.
So React introduced the JSX way of writing code which makes code easy to write and understand.
What is the React.createElement Function?
Every JSX is converted to the React.createElement and then the browser understands what's written in the JSX.
The React.createElement syntax:
React.createElement(type, [props], [...children])
This function takes three parameters:
- type which can be an HTML tag like h1, div,p.
- props which are the attributes you want the element to have
- children can contain HTML tags or can be a component
So, here we are not going deep dive into "React.createElement" now, we understand how we can use variables, loops, arrays, etc in "JSX".
Variables in JSX
So, in JavaScript, you can use variables by just typing that variable name, like the code below.
const name = "Robert"

console.log("My name is "+name)
But, you can't use variables in React like this you have to use the JSX way of using variables. The code below will give you a better understanding.
import React from "react"

const name = "Joe";
const num = 67;
const arr = ["Orange "," banana "," mango"]
function App() {
  return (
    <div className="App">
     <p>My name is {name}</p>
     <p>My age is {num} </p>
     <p>My favourite fruits are: {arr} </p>
    </div>
  );
}
export default App;
Here in "JSX" whenever we want to use any variables, we just need to put that variable name into the Curley bracket as we did above. Like this 👇
My name is {name}
Now, after variables, it's time for "JSX Comments"
JSX Comments
Comments are very important in any programming language. So, in JSX we can easily comment on anything by just putting that thing into Curley brackets like this 👇
function App() {
  return (
    <div className="App">

     {/* I am Commented */}
     {/* You can comment by pressing 👉 ctrl + / 👈 together */}
    </div>
  );
}
export default App;
Now, it's time for "Boolean" values.
Booleans in JSX
Now, we can not use booleans simply by just writing true or false in "JSX". Let's understand this by an example code below.
const name = "Joe";
const ready = true;
function App() {
  return (
    <div className="App">
     <p>My name is {name} - {ready} </p>
    </div>
  );
}
export default App;
Here we initialize a "boolean" variable named "ready", As we understand above, we can use variables in "JSX" by putting a variable name into Curley Brackets but, when here you will put "ready" into Curley Brackets, the output will gonna look like this👇

You can see that above, the "true" didn't print. The reason behind this is that "ready" is not any string value, it's a boolean value so, we have to convert it into a string then, we can easily print it. The code of doing that is shown below👇
const name = "Joe";
const ready = true;
function App() {
  return (
    <div className="App">
     <p>My name is {name} - {String(ready)} </p>
    </div>
  );
}
export default App;
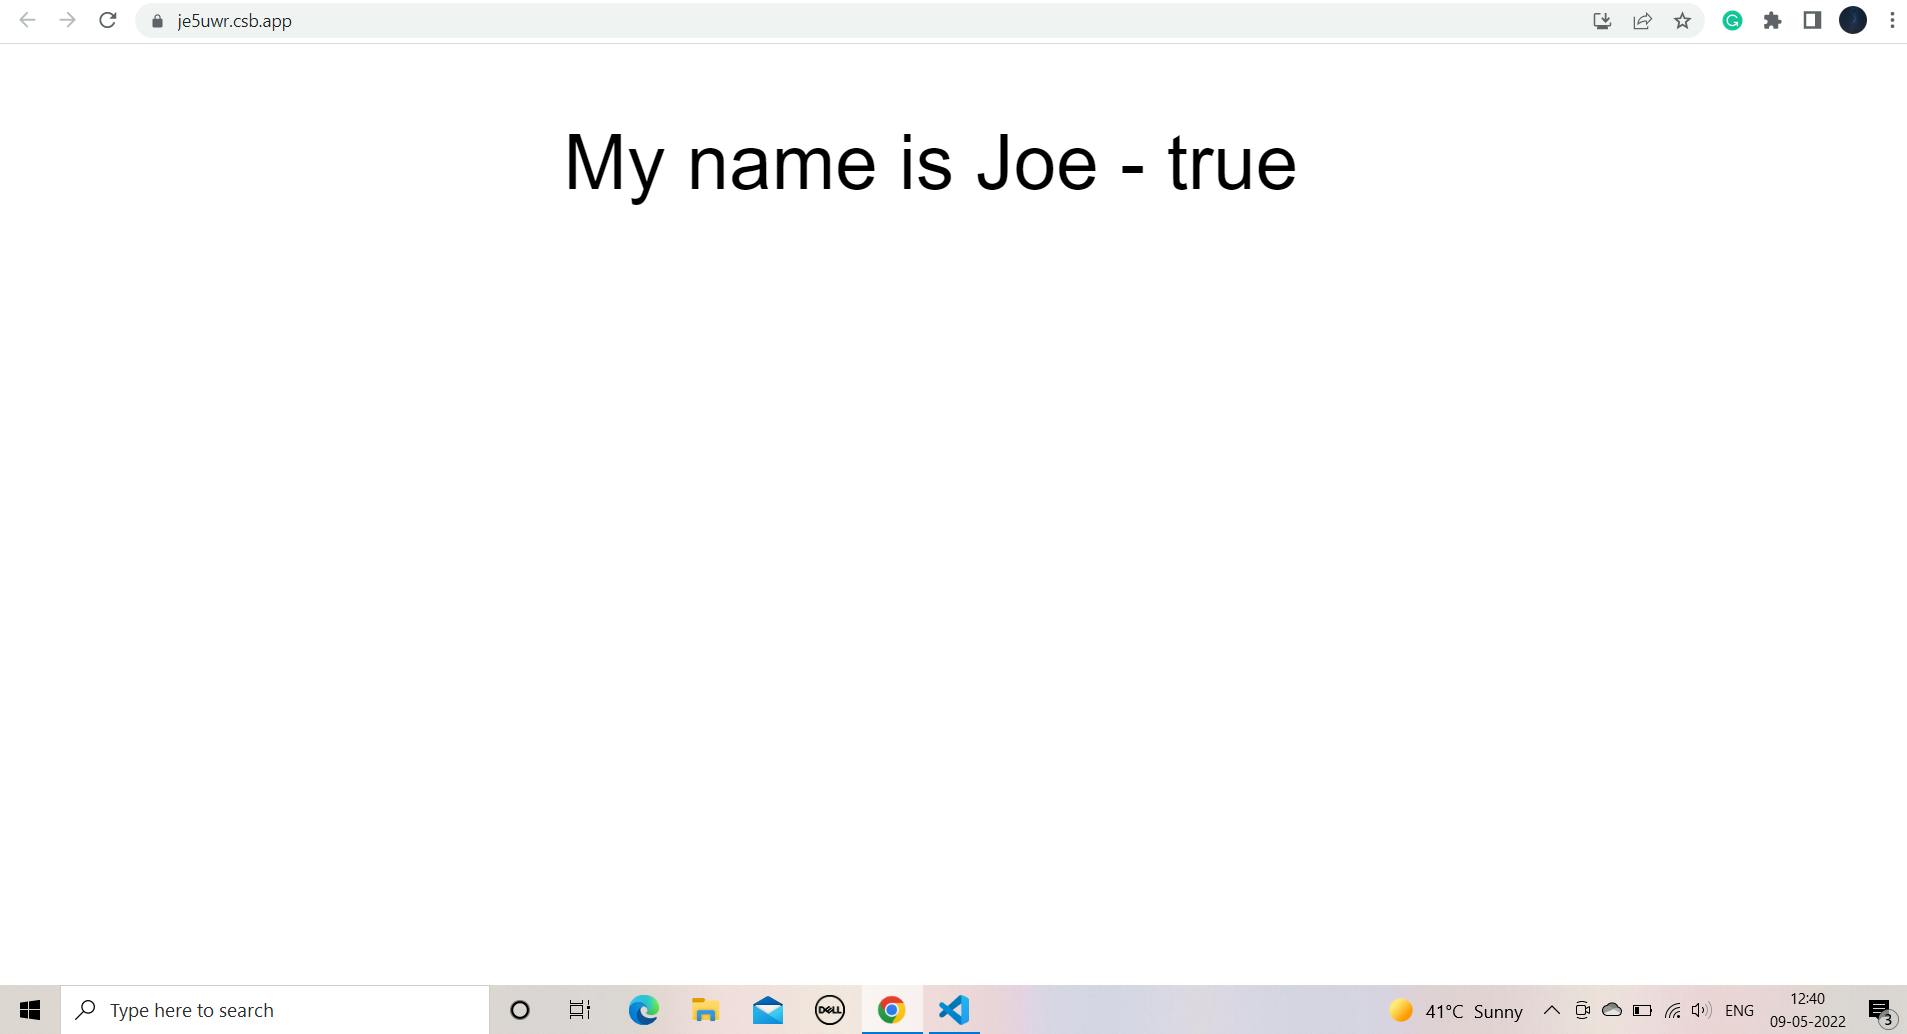
Now, you can see that above, we convert our "Boolean" into "String". Now, our output will gonna look like this.👇
Now, it's time for Conditions in JSX.
Conditions in JSX
Now, in JSX we cannot use conditions by just typing if else like JavaScript we have to use Ternary Operator. The syntax of Ternary Operator is:
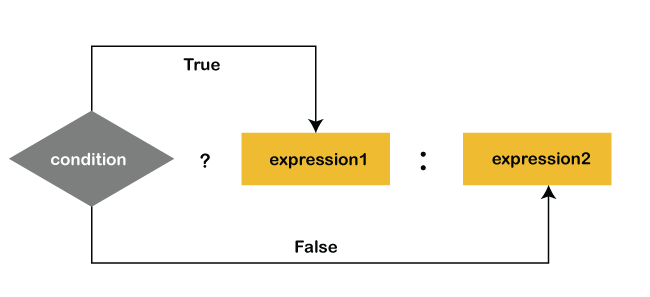
You can see that in Ternary Operator, We have one condition and then, two results. If the condition will be "True" then, expression one will execute else expression two will execute.
Code Example of Ternary Operator👇
const name = "Kyle";
function App() {
  return (
    <div className="App">

<p>{name === "Joe" ? "Hello Joe" : "Hello Kyle"} </p>

    </div>
  );
}
export default App;
You can see that above, the variable name is Kyle so, the second expression printed "Hello Kyle". If that name was Joe then, it will print "Hello Joe".
Now, we will understand how we can loop through an array or how can we print our array values in "JSX".
Arrays in JSX
So, if you have an array and you want to fetch data from an array then in JSX, you can't use "For Loops" or "While Loops". You have to use map() function.
What's the map() function?
The map() function is used to iterate over an array and manipulate or change data items. In React, the map() function is most commonly used for rendering a list of data to the DOM(Document Object Model).
To use the map() function, attach it to an array(like - Arrayname.map() ) you want to iterate over. The map() function expects a callback as the argument and executes it once for each element in the array. From the callback parameters, you can access the current element, the current index, and the array itself.
Syntax of map() function. 👇
let new_array = old_array.map(function callback( currentValue[, index[, array]]) {
    // return element for new_array
})
We can also use an arrow function like this👇
let new_array = old_array.map(callback => <p> {callback} </p> )
Example of an .map() function.
const data = [4,6,2,3,4,34,56,78];

function App() {
  return (
    <div className="App">
     {data.map((elem) => (
       <p> {elem} </p>
     ))}
    </div>
  );
}
export default App;

// OutPut

// 4 6 2 3 4 34 56 78
Here you can see that, we have an array of numbers named, "data" and, we used the map() function to iterate over an array. In the "App component" inside Curley Brackets we write our array name i.e "data" and attach it with ".map()" and, inside ".map()" we use a callback function named elem here (You can give any name to the callback) and at last, we put our callback into our "HTML" tag to print our data value.
You can also use the map function by using variables. The Below code will give you a better understanding.
const data = [4,6,2,3,4,34,56,78];
function App() {
 const element = data.map((elem) => (
       <p> {elem} </p>
     ))
  return (
    <div className="App">
    {element}
 {/* 👆 this is variable name */}
    </div>
  );
}
export default App;
Now, here we did everything the same but, just put our function logic into the constant variable and, just use that "variable" instead of the whole function. This way makes the code cleaner. You can use any of them as per your code condition.
In react we use className instead of class. We use className instead of class in our above codes too.
Note that in React, all the attribute names are written in camelCase.
Conclusion
In this article, we have seen many things about JSX. Some important points you always need to remember are:
JSX Variables(String, Boolean, arrays, integers), will be written inside curly brackets.
In React, we have to use className instead of class for adding classes to the HTML element.
Every attribute name in React is written in camelCase.
Thank You
Thank you everyone for reading this article. If you have more suggestions about this topic be free to share them with us. Don't forget to give feedback about this article.